
Everything positions #2 - reMarkable
Back at it with the remarkable coordinate system, there's something I briefly mentioned, which was PDF alignment, I kinda wanna go deeper into that, because while yes slapping two images together works for most circumstances, the actual math that works for everything is a little more involved.
Definitions
Before we begin let me clear up some things that may have not been obvious from my other blog, and also some technical words that I might use in this blog, so that if you're reading this more in-depth, you can understand what I'm trying to explain. I've also added a greenish background to help with visibility.
- Paper Size - This is the size of the device that created the lines file IN PIXELS
- The size tracker - This is a term used by
librm_linesand it is the actual size of the lines, the size tracker starts at the base paper size, expanding as you scroll down a notebook, or more importantly as we will see, in PDF it helps us tell exactly how our lines are positioned along the PDF.
The paper size is denoted in purple, the size tracker is denoted in cyan when using debug mode in librm_lines which is what you'll notice in any example images in this post. In some cases the paper size is obscured by a size tracker from another layer that is empty, but it will usually be the smaller thing that is centered in the middle.All example images will be clipped to the largest size tracker
PDFs and alignment
So let's begin with PDFs shall we, because I wanna talk about the alignment of it all and as you can tell, it's not easy, PDFs are actually a really annoying medium to work with, especially if you're used to pixels on a display...
PDFs work using pt or points per inch, I might have briefly mentioned that several times already, but I want to emphasize it again. We cannot just take pixels and expect them to work with a PDF...
Except, remarkable's coordinate system is only in pixels?!
So remarkable has a fixed DPI of 227 which it uses for aligning your lines in the PDF world.
Let's take a quick look at a PDF and it's lines separately again. Here's a 1000x500 (PT) PDF
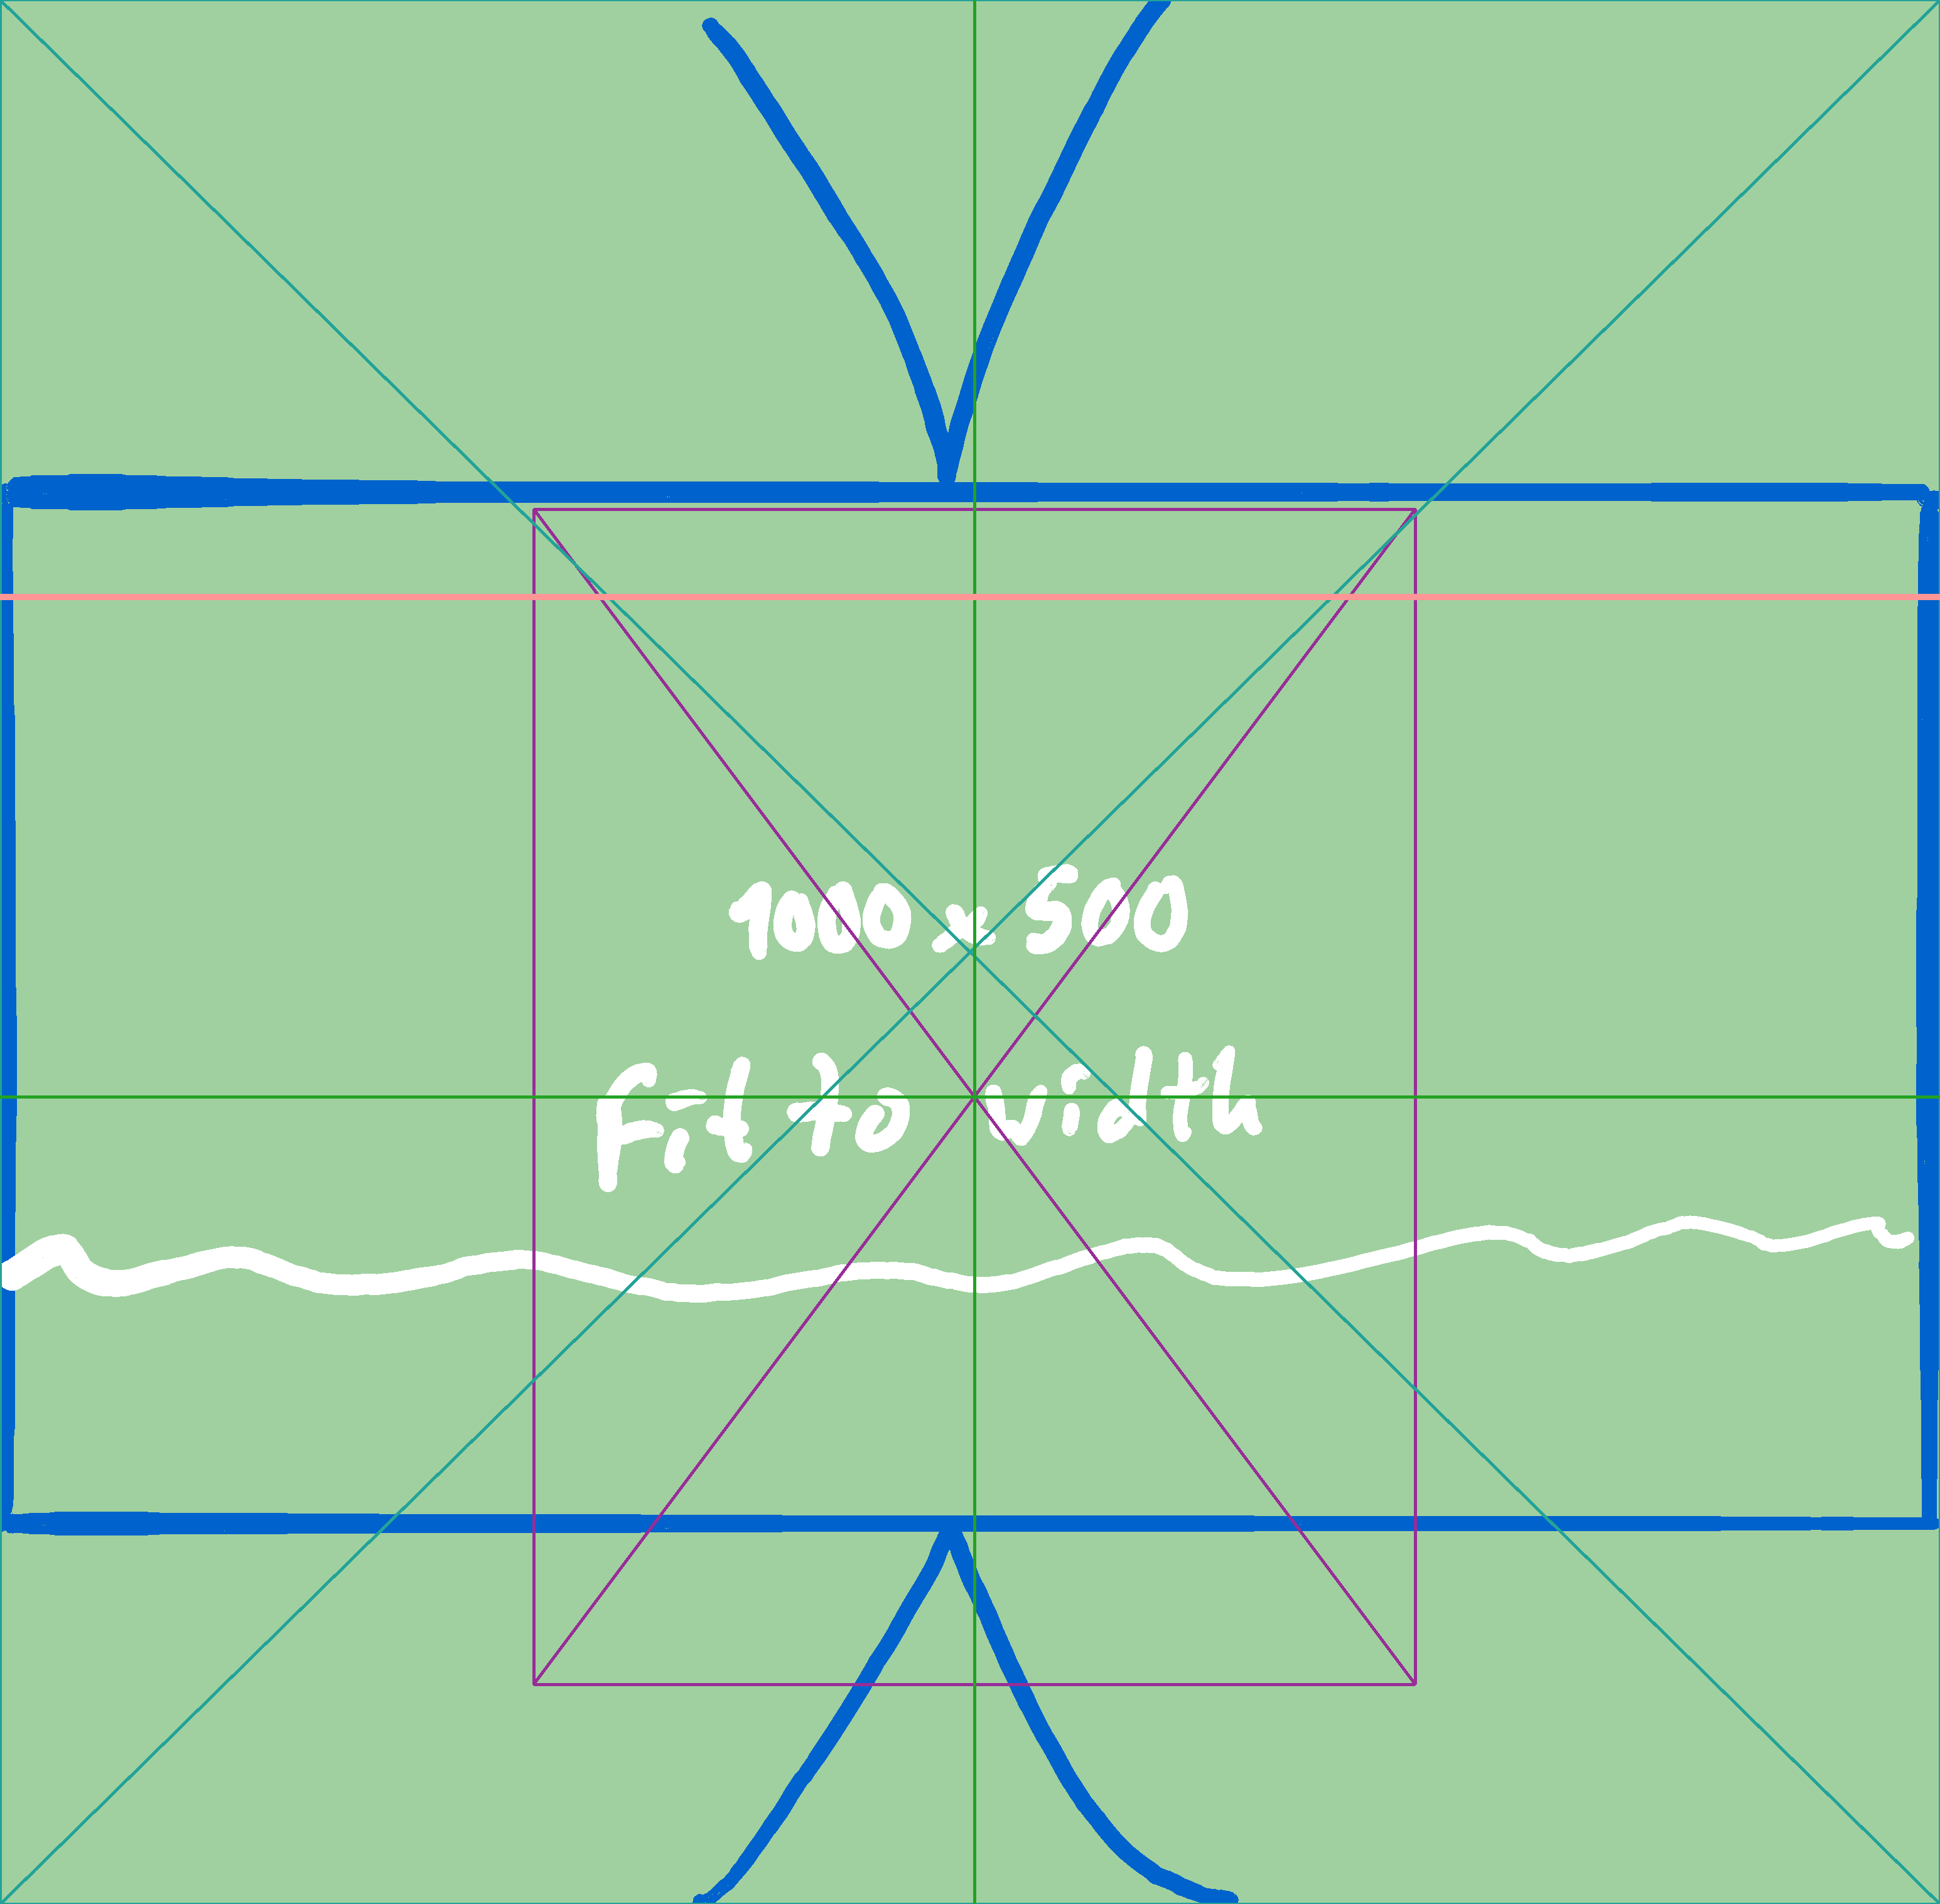
Let's analyze! First off this is in pixels, but the size tracker goes way outside the paper size, and this completely normal for PDFs, what remarkable is actually doing is scaling up your lines a bit. Another thing is this PDF is centered along the top center of the paper size
Let's take a quick look at a more interesting example, this PDF is the exact ratio of the rM2 but in (PT) which is good to keep in mind...
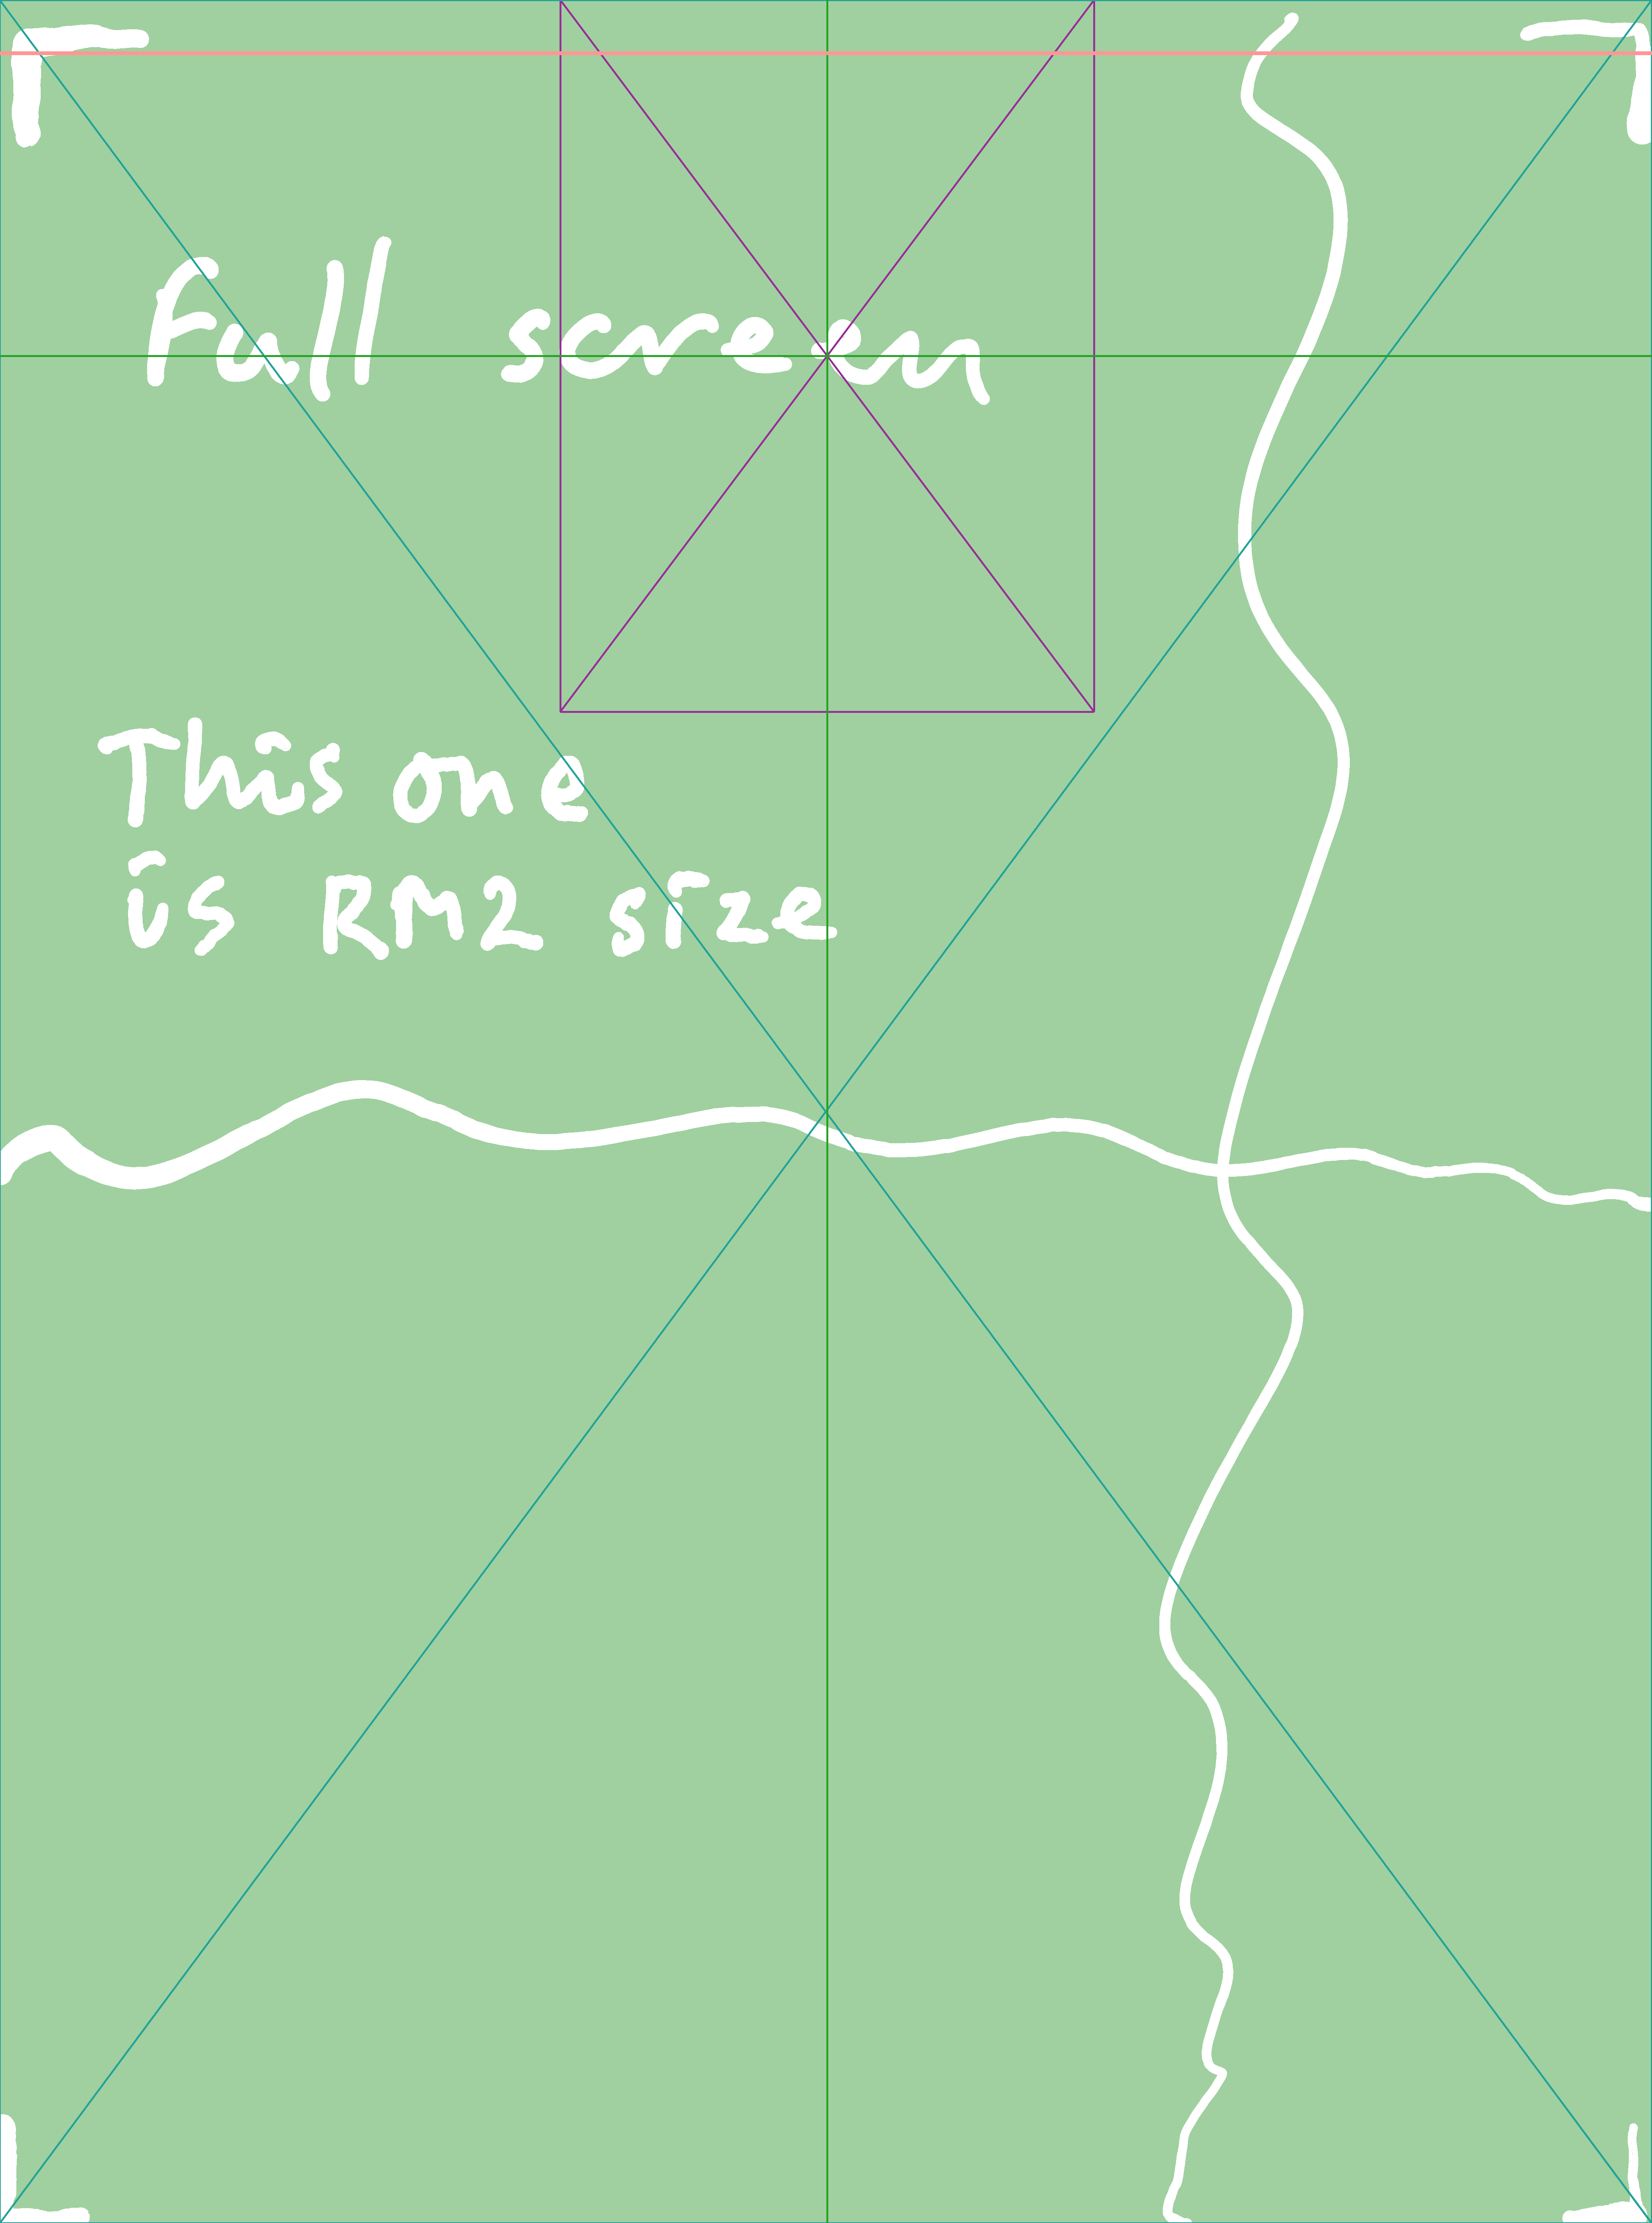
Again we can see that the PDF is centered along the top center of the paper size and this time the lines expand downwards. If you haven't caught on, if the PDF is longer or conforms to the size of the tablet it will start at the top, otherwise the tablet tries to center it in the middle vertically.
I should also note, the PDF alignment mode you select on the device, is not at all used here. All PDFs are centered and aligned width-wise,
Another thing you might have noticed is that for a rM2 sized PDF, the pixel size is exactly 227/72 times the paper size, which is around 3.15 and I will just mention it as PDF_SCALING from this point onward. So I hope you read everything else carefully, but just to recap:
- The default DPI remarkable uses for PDFs is 227
- A PT is
1/72of an inch - At
227 DPI, one PDF point corresponds to227/72 ≈ 3.15pixels. - Therefore,
pixels = points × PDF_SCALING, wherePDF_SCALING = 227/72.
Expanding a PDF correctly
So now we know how big our lines are, where the PDF stands on those lines, we know that they use different coordinate systems, so how would we take a PDF and expand it correctly to fit any lines drawn in the blank space around the PDF?
Interactive PDF lines demo
I will show two examples with real numbers to show my math stands. Let's go back to our 1000x500 (PT) PDF, cause it's a little more interesting, in that case the PDF is centered on the paper size, now the size tracker shows the top, left, bottom, right sides of the page, where top=0, left=0 is indeed the top left of the paper size, which means when it goes negative that is beyond paper size, you can see the real values in the remarkable coordinate system below by moving around your cursor
I will also show you something else, here's a 500x1000 (PT) PDF, This time since the PDF is longer than the remarkable, the device puts it at the very top, again, although as you may have realized that's always the case, the only thing that changes is the size tracker, for PDFs centered in the middle of the screen, drawing on top of them means going just above the paper size, another thing to note here is that this PDF was drawn on in both height and width modes, yet the size tracker remains the same, the only difference is where the lines are, and nothing else.
Yes I spent over 3 hours making these interactive tests. I hope you enjoyed the little demo.
Scaling the mediabox
If you've touched even just a little on PDFs, you might know that they have several different boxes with different scales, I won't go too much into those since I haven't seen a normal PDF use anything other than a mediabox, all other boxes are usually the same.
The mediabox declares both the offset of the PDF and its size (in PT) so knowing that and our expansion area we can figure out how to expand the PDF, one thing I will note, is that PDFs have a lower left coordinate system, which only serves to make things more confusing. This means that if we add a height of 500 for example, the pdf will swoosh down while expanding the space above, we can quickly see that with our 1000x500 PDF
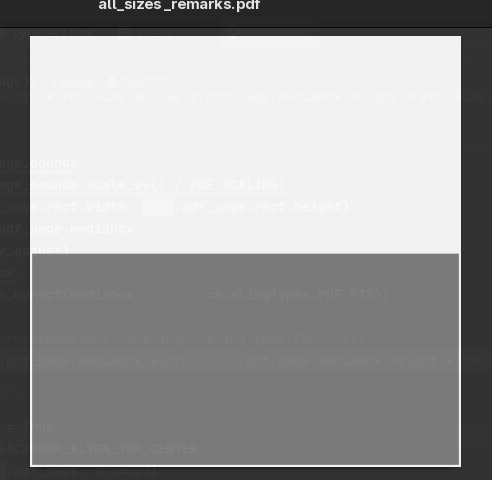
1000x500 PDF with an added 500 (PT) of heightThis means that we need to be careful about how we will expand it, first let's determine the overall height, that would be the space above the size tracker so -top and the size of the bottom, subtracting the bottom plus the height of the PDF, that wasn't so difficult after all, we now also take a similar principle for the vertical alignment, where the PDF is centered, instead of being on the top, so we can just take the PDF width and subtract the paper width and that gives us the sides, so left becomes -left - side and right becomes right - side - paper_width because remember, the right is the area from the very left, to the very end, not from the paper ends, you can go look at the example above again if that sounds weird in your head.
And so I present, the final math!page_bounds is the combined max of all size trackers.pdf_size_px is the PDF size in pixels, which again as we discussed should use the default remarkable DPI of 227.paper_size as mentioned before is the physical device size recorded in the lines file.
pdf_side = (pdf_size_px[0] - paper_size[0]) / 2
pdf_expand_left = (-page_bounds.left) - pdf_side
pdf_expand_right = (page_bounds.right - pdf_side - paper_size[0])

pdf_expand_top = -page_bounds.top
pdf_expand_bottom = page_bounds.bottom - pdf_size_px[1]

pdf_expand_x = max(0, pdf_expand_left) + max(0, pdf_expand_right)
pdf_expand_y = max(0, pdf_expand_top) + max(0, pdf_expand_bottom)
This turned out to be quite the roller coaster yet again, thanks to reMarkable's weird coordinate system and PDF's also quite weird coordinate system. I wanna leave this post on a few last technical details.
You may have noticed that I capped the final values, but there's a good reason I didn't cap all the values. Sometimes the lines may be inside the PDF and not outside of it, these values already tell us those offsets when negative, so now negative values mean insetting, positive values obviously mean expanding, so we can use these values both for expanding the PDF if necessary but to also position our lines at the end.
Here's how this ties in, the mediabox where we care about expanding,
and the offset and size of the lines, where we care about insetting.
mediabox = Rect(
    -max(0, pdf_expand_left),           # LEFT
    -max(0, pdf_expand_bottom),         # BOTTOM*
    pdf_size_px[0] + pdf_expand_x, # PDF_SIZE + EXPAND
    pdf_size_px[1] + pdf_expand_y  # PDF_SIZE + EXPAND
)
* Again, PDFs scale from the bottom, so we need to offset it using the pdf_expand_bottom
offset = (
    -min(0, pdf_expand_left),
    -min(0, pdf_expand_top)
)
size = (
    mediabox.width + min(0, pdf_expand_left) + min(0, pdf_expand_right),
    mediabox.height + min(0, pdf_expand_top) + min(0, pdf_expand_bottom)
)
We use min instead of max to get proper insetting
I think I'm fed up with PDFs, but thankfully there isn't much else to discuss about them, we've unlocked and worked out the math that joins the two worlds of PDF and reMarkable's lines format into one coherent and elegant mess.
This research was partially funded by Scrybble and is part of ongoing work on remarks to integrate librm_lines. If you haven't already you should read my previous post which covered coordinates and scaling as well!
That's all from me for now, see you next time!
~Red

